tl;dr These dimensions will create an 8 page A4 zine using Word labels via the Mailing tab which you can then lay out online and print.
 This will produce something like the below (with narrower gaps between each ‘label’ but shown here for clarity).
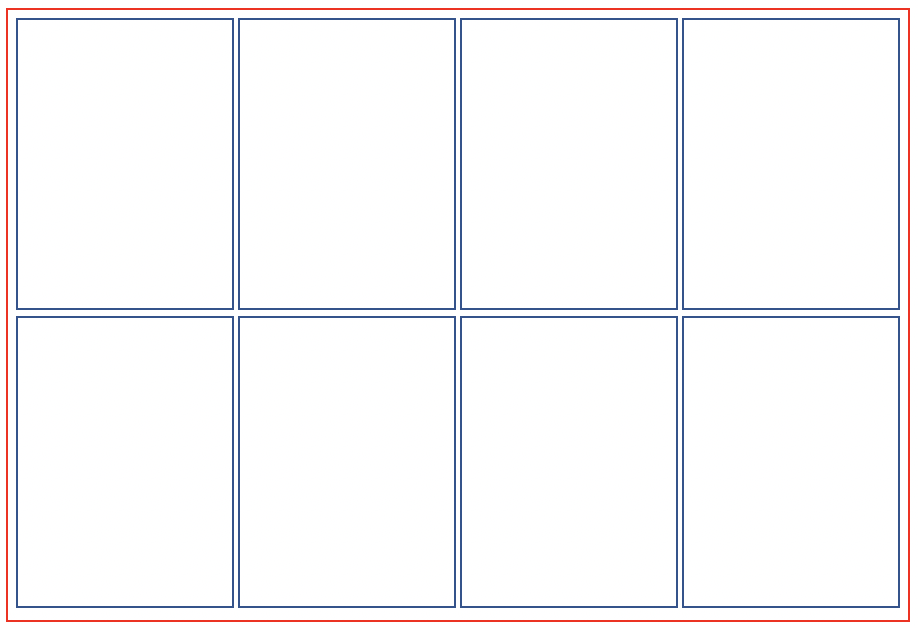
1. Zine-making old school
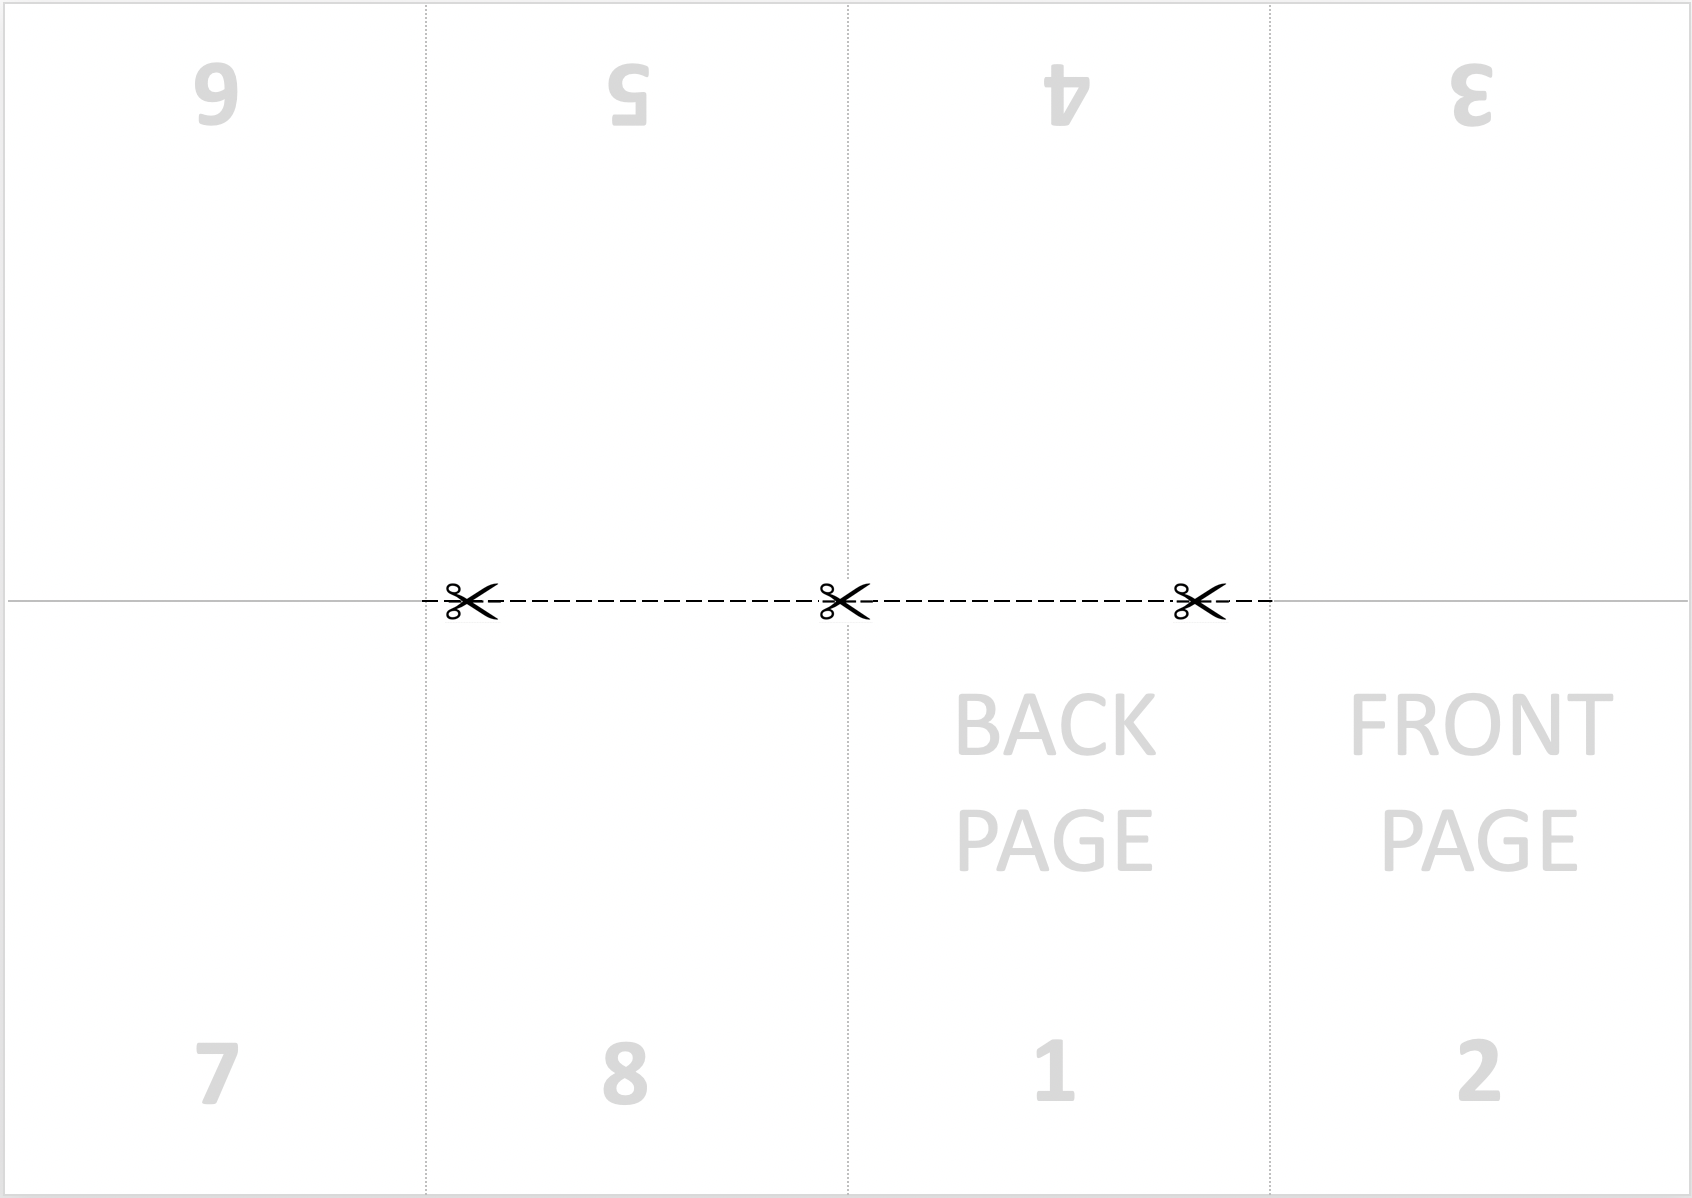
Take an A4 sheet of paper and fold in half in both directions (‘hotdog’, lengthways [long edge to long edge] and ‘hamburger’ widthways [short edge to short edge]) and re-open, bending the folds backwards and creasing them. Then fold each short edge to the middle and eventually you have a piece of paper with 8 segments as ‘pages’. Have a look at https://zineopolis.blogspot.com/p/h.html to see how the finished zine will be when cut and folded then write and draw whatever you want on the pages, bearing in mind the page number order and direction of text. Fold ‘hamburger’-ily again and cut the middle bit leaving a neat tear, then assemble as in the info in the link. You can scale up by drawing or gluing things to a master and then photocopy it.
2. Zine-making new school – slightly techier version
Create a Word template using Labels so that you can create a printable zine with whatever elements you want to include. You can then photocopy multiples and distribute. I’m making a mini zine for an event at work so I wanted something with our logos on, and for it to be slightly more tidy-looking than something I’d hand draw.
- Open Word
- Mailings tab
- Start Mail Merge > Labels
- New Label…
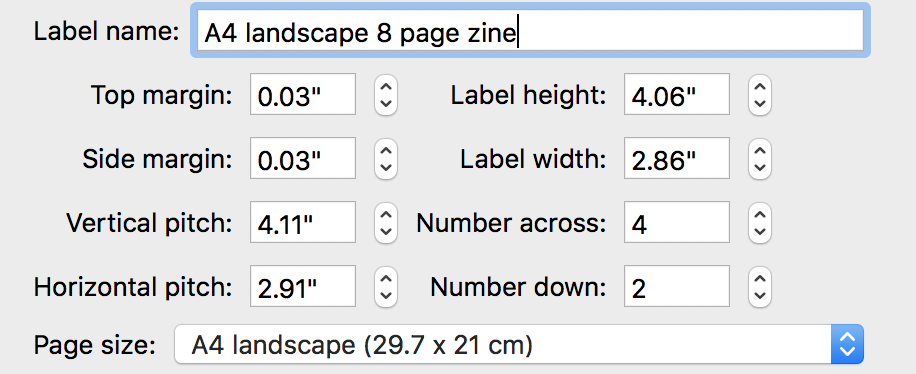
- Below the picture, in ‘Label name’ give it a name
- At the bottom of the box, in ‘Page size’ change it to A4 Landscape (29.7 x 21cm)
- Enter the figures as shown below, then press OK
- If you want to restart at any point and adjust the layout repeat steps 1-3 then scroll upwards to find your custom label name, highlight it then click on Details… changing anything and pressing OK will wipe what you’re doing so you may want to save a copy first. Recommend writing down any number changes you make!
 Top margin: 0.03″
Side margin: 0.03″
Vertical pitch: 4.11″
Horizontal pitch: 2.91″
Label height: 4.06″
Label width: 2.86″
Number across: 4
Number down: 2
Make sure you have the right page size & that it’s landscape!
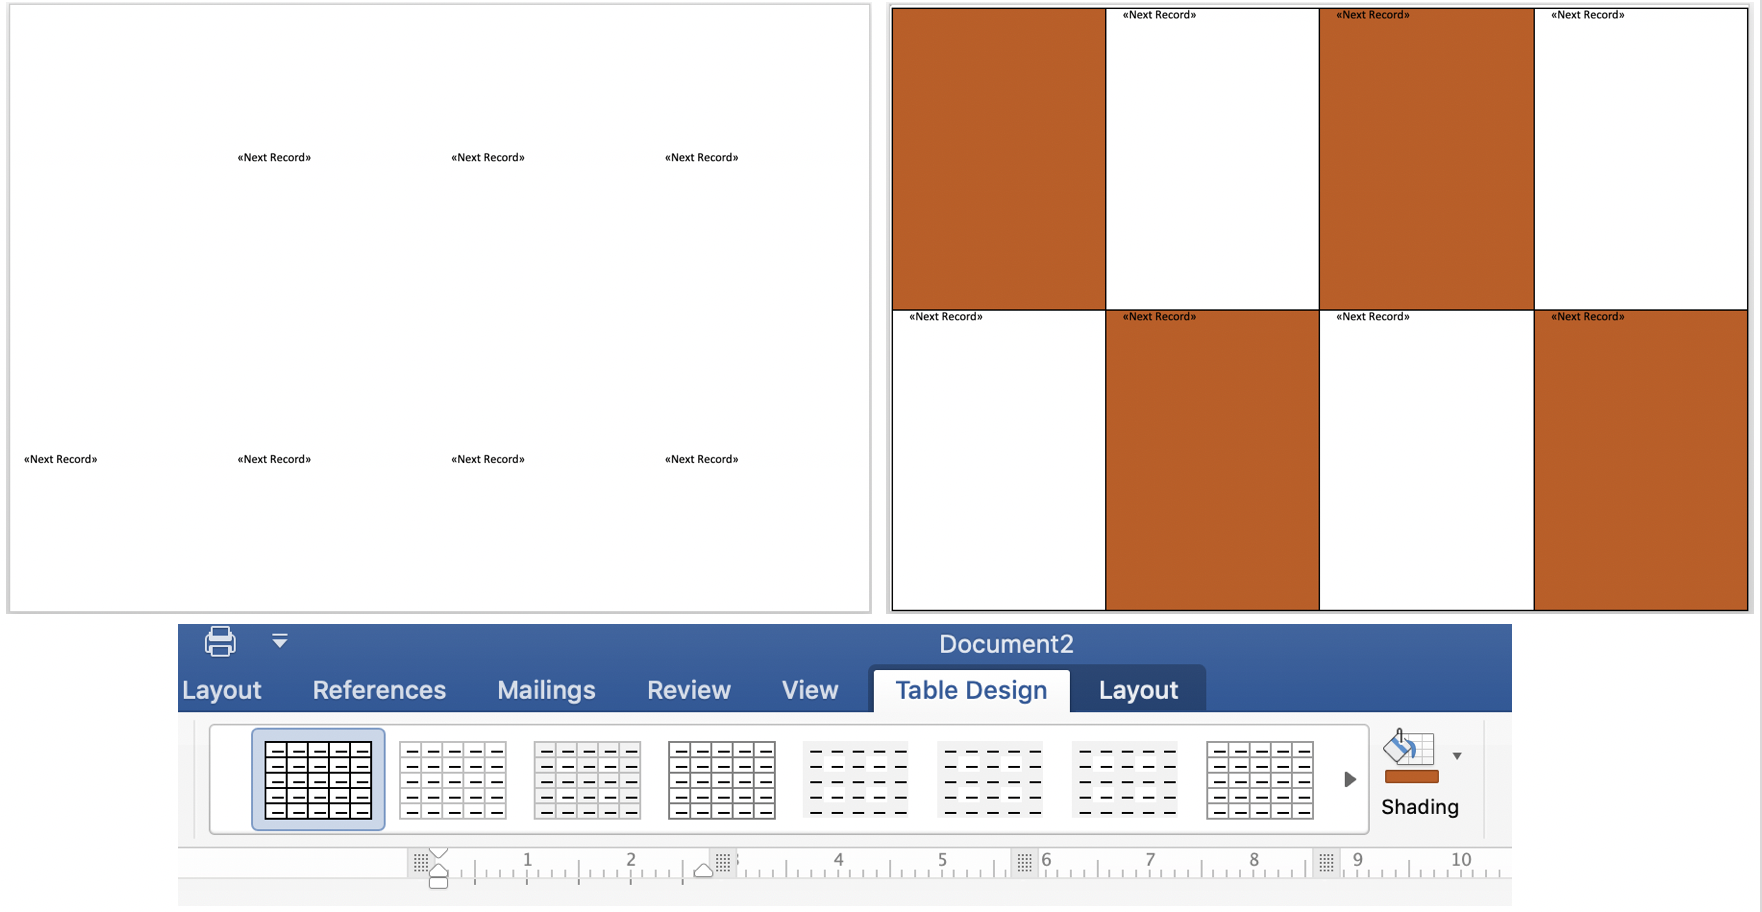
Note that the vertical pitch “is defined as the measurement from the top of the first label to the top of the label below it. The horizontal pitch is defined as the measurement from the left edge of the first label to the left edge of the label next to it.” Source. Once you’ve pressed OK you’ll see a largely blank page with <<next label>> written several times but to see where the labels begin and end more clearly click on the Table Design tab that now appears and then click any of the grid options to see the lines.
I’d previously created an entire ‘zine’ in PowerPoint which is my software of choice for laying out any text and images (eg for flyers) but I couldn’t get it to print correctly. I also tried with Scribus, which is open source desktop publishing and layout software, but while it (and PowerPoint) looked great on the screen I couldn’t get the thing to print without introducing further margins. Remembering I’d recently vanquished Mail Merge and label printing I wondered if I could use that to override the margins with a custom ‘label’ – yep, Word worked.
3. Laying out the zine in Word (using PowerPoint!)
It was quite handy that I already had a pret-a-zine, as a .pptx, as it made it much quicker to re-create the zine in Word by selecting multiple items on each ‘page’, copying, then pasting into the Word zine, then moving into the relevant segment and neatening up. In fact I might actually recommend doing this step beforehand [download Basic powerpoint zine layout] because PPoint is more obedient in terms of letting you move images wherever you want them, it’s a bit more of a fight in Word. To control the position of images in Word I used the Picture Format > Wrap Text: In Front of Text which got them to behave. There’s probably a better way but this worked fine. I was absolutely delighted, on printing and folding the Word label version, that it worked perfectly.
4. How to rotate text and images in PowerPoint
Start a new text box and type some text in it. Then click on the ‘hook’ at the top and drag/rotate to turn the text in any direction, it will smoothly rotate through 360 degrees. Use the shift key to get it to snap to the next degree-minute thing, eg if you’re rotating it so that it’s upside down you can hold the shift key near the end to force it to jump to 180. It’s the same for any images or shapes, they can all be rotated.
When you click PLAY in the video below move the mouse away so that it hides the title (which covers a tiny bit at the top).
5. A note on the calculations for pedants and enthusiasts – worked example
An A4 sheet is 11.69 x 8.27 inches, 29.7cm x 21cm (297mm x 210mm) or 842 x 545 pts in Post Script.
The figures above worked perfectly for me and my printer. Technically I made a very slight error in my calculation as I’d intended that all margins and space ‘units’ between each ‘label’ would be 0.05, meaning that I’d have 5 units horizontally (left and right margins + 3 spaces between four labels / columns) and 3 units vertically (top and bottom margins + 1 space betwen the two rows).
To get the ballpark figures for the dimensions I divided the long edge (width) by 4 and the short edge (height) by 2 to make 8 labels – 11.69/4 = 2.92 inches and 8.27/2 = 4.135 inches. To work out the available width minus the margins and spaces I subtracted 5 x 0.05 (0.25) from 11.69 getting 11.44 inches, and for the height: 3 x 0.05 (0.15) from 8.27 getting 8.12 inches. I then divided the width into 4 (11.44/4 = 2.86), and height into 2 (8.12/2 = 4.06). So 2.86 inches is the width of one label.
The pitch (width plus one space) is 2.86+0.05 = 2.91 inches. Similarly 4.06 is the height of one label and the pitch is 4.06+0.05 = 4.11. The two margins had been 0.05 but it didn’t work until I shaved a bit off and made them 0.03! The yellow dots in the picture below denote 0.05 but in the end the outer ones (red and orange) became 0.03″ to make it fit 😉 

